Unlock Perfect Pies: Master the Two-Chilling Secret to a No-Shrink Crust
There’s a common culinary heartbreak many home bakers share: the dreaded pie crust shrinkage. You spend time meticulously crafting a beautiful, flaky pastry, only to pull it from the oven and find its once proud, fluted edges have slumped sadly down the sides of the pan. It's deflating, frustrating, and, thankfully, entirely preventable.
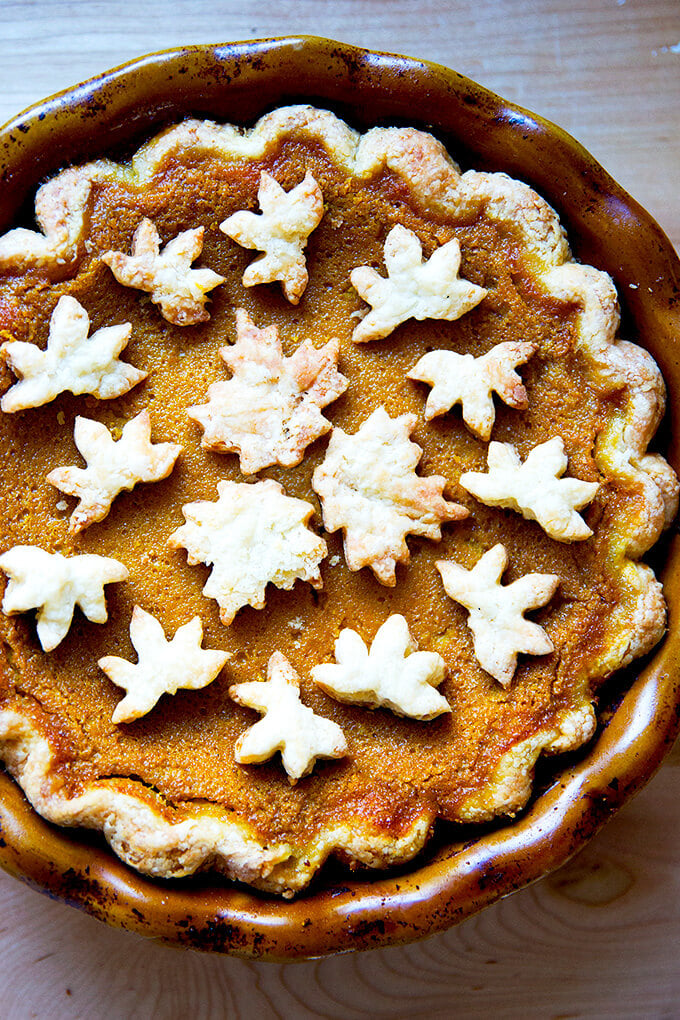
For years, this culinary conundrum plagued me too. I tried countless recipes, tweaking ingredients and techniques, always hoping for that elusive, perfectly crisp and full-sized crust. The breakthrough came not from a magical ingredient, but from a deeper understanding of dough mechanics, culminating in two strategic, non-negotiable chilling periods. This isn't just a recipe; it's a science-backed method, refined over countless pies, designed to give you a foolproof, no-shrink pie crust every single time. And the best part? The stable, delicious dough you create is also perfect for making irresistible
pie crust cookies from any trimmings!
The Science of Shrinkage: Understanding Your Dough
Before we dive into the solution, it’s essential to understand the "why" behind pie crust shrinkage. The culprits are primarily two: gluten development and warm fat.
The Gluten Effect: The Elastic Enemy
Flour, when mixed with water, forms gluten – an elastic network of proteins. Think of gluten strands as tiny, coiled rubber bands. When you mix and roll out pie dough, you activate and stretch these "rubber bands." If these gluten strands aren't given time to relax, the heat of the oven causes them to snap back, pulling the edges of your crust down with them. This elastic recoil is the primary reason your pie crust retracts from the pan walls. Excessive handling or overworking the dough also contributes to strong gluten development, making shrinkage more likely. For a deeper dive into this phenomenon, you might find our related article,
Stop Pie Crust Shrinkage: Why Gluten & Cold Fat Matter, particularly insightful.
The Fat Factor: Preserving Flakiness and Structure
A truly flaky pie crust is built on layers – countless paper-thin sheets of dough separated by pockets of solid fat. In the oven, the water in the dough turns to steam, pushing these layers apart and creating those desirable airy pockets. This is what gives pie crust its signature texture. However, if your butter or shortening gets too warm during mixing or handling, it melts into the flour prematurely. When this happens, you lose those distinct layers. The dough becomes dense, greasy, and far more prone to slumping and shrinking as it bakes because its structural integrity has been compromised. Keeping the fat consistently cold is crucial for achieving that coveted light, flaky texture and maintaining the crust’s shape.
Mastering the Two Chilling Steps: Your Foolproof Strategy
The secret to a perfectly stable, no-shrink pie crust lies in respecting the dough's need for rest. This method employs two crucial chilling steps that work in tandem to relax gluten and solidify fat, ensuring your crust holds its shape beautifully. These are the *2 tips for no shrink pie crust* that will transform your baking.
Step 1: The Initial Chill – Relaxing the Gluten
After you've mixed your dough, but *before* you roll it out, it needs a good, long rest in the refrigerator.
*
The "Why": This first chill is vital for allowing the gluten strands, which were just developed during mixing, to fully relax. Imagine those "rubber bands" slowly unwinding. This not only prevents shrinkage but also makes the dough much easier to roll out without tearing or fighting you.
*
The "How": Form your mixed dough into one or two flat discs (discs are easier to roll out later than balls) and wrap them tightly in plastic wrap. Refrigerate for at least 30 minutes, but ideally 1 to 2 hours. You can even make the dough a day or two in advance.
*
Expert Tip: Don't rush this step! A well-rested dough is a cooperative dough. If you try to roll it out too soon, it will resist, spring back, and be more likely to shrink later.
Step 2: The Final Chill – Setting the Structure
This is perhaps the most critical step for preventing shrinkage during baking. Once you've rolled out your dough and carefully fitted it into your pie dish, it's time for another, often colder, chill.
*
The "Why": This second chill (or even a brief freeze) solidifies the fat within the shaped crust. When the fat is rock-solid, it creates a rigid structure that can withstand the initial blast of heat in the oven. The dough's shape is locked in place before the butter has a chance to fully melt, thus preventing slumping and shrinkage. It also further relaxes any gluten that might have been developed during the rolling process.
*
The "How": After fitting the dough into your pie plate and crimping the edges, place the entire pie plate back into the refrigerator for at least 30 minutes, or even better, into the freezer for 15-20 minutes.
*
Expert Tip: Bake your pie crust *immediately* after removing it from this final chill. The colder the dough goes into the hot oven, the more dramatic the temperature shock, and the less likely it is to shrink. For comprehensive guidance on both these essential chilling phases, refer to our article:
Master No-Shrink Pie Crust: The 2-Step Chilling Secret.
Crafting Your No-Shrink Pie Crust: A Recipe for Success
With the "why" and "how" of chilling understood, let's put it into practice. Here’s a reliable recipe that incorporates these foolproof techniques.
Ingredients:
* 2 ½ cups (300g) all-purpose flour, spooned and leveled
* 1 teaspoon kosher salt
* 1 cup (226g / 2 sticks) unsalted butter, *very cold*, cut into ½-inch cubes
* ½ cup (120ml) ice water, plus 1-2 tablespoons more if needed
Instructions:
- Combine Dry Ingredients: In a large bowl, whisk together the flour and salt.
- Cut in the Butter: Add the very cold, cubed butter to the flour mixture. Using a pastry blender, your fingertips, or a food processor (pulsing), cut the butter into the flour until it resembles coarse meal with some pea-sized pieces of butter remaining. These chunks are key for flakiness.
- Add Ice Water: Gradually add the ice water, a tablespoon at a time, mixing gently with a fork or your hands until the dough just comes together. Be careful not to overmix; you want to hydrate the flour just enough for the dough to form, but not develop too much gluten. The dough should be shaggy but cohesive when squeezed.
- The First Chill (Relax the Gluten): Divide the dough in half and gently form each half into a flat disc. Wrap each disc tightly in plastic wrap and refrigerate for at least 1 hour (up to 2 days). This is the crucial first chill.
- Roll Out the Dough: On a lightly floured surface, roll out one disc of chilled dough from the center outwards, rotating it frequently, until it's about 12-13 inches in diameter and about ⅛-inch thick. Avoid stretching the dough.
- Transfer to Pie Plate: Carefully transfer the rolled dough to a 9-inch pie plate. Trim the edges, leaving about a 1-inch overhang. Fold the overhang under itself and crimp or flute the edges as desired. Repeat with the second dough disc if making a double-crust pie or saving for another use.
- The Second Chill (Set the Structure): Place the pie plate with the shaped crust into the freezer for 15-20 minutes, or the refrigerator for at least 30 minutes. This essential second chill sets the butter and gluten, preventing shrinkage.
- Blind Bake (if needed): For a pre-baked crust, line the chilled crust with parchment paper and fill with pie weights, dried beans, or rice. Bake in a preheated 400°F (200°C) oven for 15-20 minutes, then remove weights and parchment and bake for another 10-15 minutes until golden brown. For a filled pie, follow your recipe's instructions, adding the filling to the chilled crust directly.
Beyond the Pie Plate: Delicious Pie Crust Cookies!
One of the delightful bonuses of mastering this no-shrink pie crust technique is what you can do with the leftover dough trimmings. Instead of discarding them, transform them into delightful
pie crust cookies! Because this dough is so stable and holds its shape beautifully, it’s perfect for these small, delicate treats.
Simply gather any leftover dough trimmings, gently re-roll them on a lightly floured surface, and cut them into fun shapes using cookie cutters. Brush with a little milk or egg wash, then sprinkle with sugar, cinnamon sugar, or even a dash of flaky sea salt for a savory twist. Bake on a parchment-lined baking sheet at 375°F (190°C) for 8-12 minutes, or until golden brown and crisp. These *pie crust cookies* are a fantastic way to minimize waste and provide a delicious snack while your pie bakes!
Conclusion: Your Journey to Perfect Pie Crusts
Say goodbye to saggy, shrunken pie crusts forever. By understanding the twin forces of gluten development and melting fat, and implementing these two non-negotiable chilling steps, you unlock the secret to consistently perfect, flaky, and full-sized pie crusts. From Thanksgiving pumpkin pies to everyday quiches, your crusts will now be a source of pride, not frustration. Embrace these *2 tips for no shrink pie crust*, and don’t forget to turn those delicious trimmings into delightful *pie crust cookies* – a testament to your newfound baking mastery!